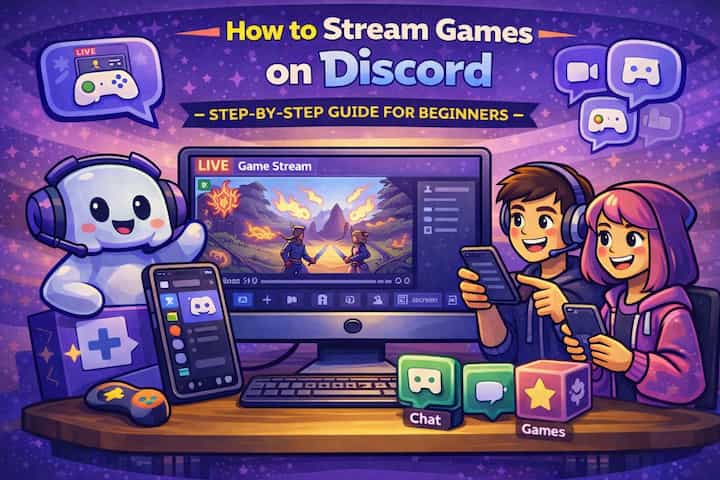
How to Stream Games on Discord (And Get It Looking Good Without Nitro)
Discord's game streaming feature gets overlooked because people assume it's a lesser version of Twitch or a complicated setup. It's neither. It's a fast, frictionless way to share gameplay with the people you're already talking to - no streaming key, no broadcast software, no separate account. You're in a voice channel, your game is running, and you click one button. The people you're playing with can watch you live while you're talking to them.
Here's how the whole thing works, what settings actually matter, and how to fix the issues that show up most often.
Quick Answer (For Those in a Hurry)
Launch your game, join a voice channel in Discord, and click the Go Live button that appears in the bottom-left panel. Select your game from the detected applications list, choose your resolution and frame rate, and click Go Live again to start. Viewers in the voice channel see a stream preview they can click to watch. Stop the stream at any time by clicking the red stream icon or the Stop Streaming button.
What This Guide Actually Helps You Do
This guide is designed for readers who want to run a voice, video, screen sharing, streaming, or recording session with fewer technical surprises. It adds value beyond the basic menu path by explaining which device, permission, audio source, video quality, and privacy boundary should be set before the session starts. That matters because live features tend to fail at the worst moment when microphone access, screen permissions, bandwidth, or participant expectations were not tested.
The practical goal is to leave you with a result you can verify, not just a menu path you followed. It also keeps the limits visible: this guide does not pretend to offer perfect quality on every connection, secret recording, or a way to bypass platform and local consent rules. It shows the reliable path, the trade-offs, and the checks that help you avoid repeating the same mistake.
Real Situations Where Streaming on Discord Is the Right Tool
Discord game streaming solves a specific problem: sharing gameplay with people you're already in a voice call with, without the overhead of a public broadcast.
You want your friends to watch you play something and react in real time, not a recording after the fact. The combination of live gameplay and shared voice chat creates a genuinely different experience from watching a VOD or a Twitch stream. Your friends are watching exactly what you're seeing as you see it, reacting out loud, asking questions, calling out things you missed. It's cooperative engagement with a game even when only one person is playing, and Discord's setup for this takes about thirty seconds.
You're in a gaming community and want to show off something - a build, a route, a strategy, a clip-worthy moment as it happens. Posting a video after the fact loses the immediacy. Streaming it live while it's happening means the community can watch, comment in text channels, and react in voice simultaneously. This kind of spontaneous "come watch this" energy is exactly what Discord's Go Live feature is designed for - it's casual enough to start without preparation and immediate enough to be relevant.
You're teaching someone how to play something and explaining it in words isn't working. Showing is faster than telling for most game mechanics - positioning, timing, routing, build order. A live stream where you explain what you're doing as you do it, while the student watches and asks questions in real time, collapses the learning curve in a way that recorded tutorials can't replicate. You can pause, repeat, slow down, and respond to questions on the fly because it's a conversation, not a broadcast.
Before You Go Live: One Thing to Know
Discord's game streaming quality is tied to whether Discord detects your game as a recognized application - not just any window. When Discord recognizes your game, it uses a game-capture method that produces smoother frame rates and better performance than generic window capture. If your game doesn't appear in the Go Live menu automatically, go to User Settings -> Activity Status -> Add it and add the game executable manually. This single step makes a meaningful difference in stream quality for games Discord doesn't detect on its own.
The quality ceiling for free accounts is 720p at 30fps. Discord Nitro raises this to 1080p at 60fps or higher, but 720p/30fps is clear enough for most gaming content - especially when you're streaming to friends rather than a public audience judging production quality.
How to Stream a Game on Discord - Step by Step
Step 1 - Launch Your Game and Open Discord
Start your game first and let it fully load. Then open Discord. Discord scans for running processes and detects known games automatically - the detection happens in the background while the game is running, so launching Discord after the game is already running usually triggers detection faster than the other way around.
Step 2 - Join a Voice Channel
Navigate to the server where you want to stream and click on a voice channel to join it. The Go Live button only appears when you're connected to a voice channel - you can't initiate a game stream outside of one.
Step 3 - Click Go Live
Look at the bottom-left panel while you're in a voice channel. If Discord has detected your game, you'll see a Go Live button with a small game controller icon. Click it to open the stream setup menu.
If the button isn't appearing, see the Advanced Tips section below for troubleshooting detection.
Step 4 - Select Your Game
The stream setup menu shows Discord's detected applications. Your game should appear here - click it to select it as the stream source. If multiple games or applications appear, make sure you're selecting the correct one. If your game is missing, you can switch to screen share mode and choose the game window manually, though this uses generic capture rather than game-optimized capture.
Step 5 - Choose Your Stream Quality
Select the resolution and frame rate for your stream. For free accounts: 720p at 30fps is the standard quality. For Nitro users, options up to 1080p/60fps are available. If your internet upload speed is limited (under 5 Mbps upload), start with 480p or 720p/30fps to avoid lag and dropped frames. You can change quality settings mid-stream if needed.
Step 6 - Go Live
Click Go Live to start streaming. A notification appears in the voice channel showing that you're live and which game you're streaming. Members in the channel see a preview thumbnail they can click to open your stream in a larger view. You'll see a small streaming indicator in your voice panel confirming the stream is active.
Step 7 - Manage and Monitor Your Stream
While streaming, the voice panel shows your stream status. You can click the stream controls to pause (if you need a moment without viewers seeing), switch the stream source to a different window, or access stream settings to adjust quality. Your game audio is included in the stream by default - viewers hear what's playing in your game.
Step 8 - Stop Streaming
When you're done, click the red stream icon in the voice panel or select Stop Streaming from the controls. The stream ends immediately and you remain in the voice channel. Your stream history isn't saved anywhere on Discord - there's no VOD or replay available after it ends.
What Changes While You're Streaming
The moment you go live, other members in the voice channel see a stream card in the channel sidebar showing your username, the game you're streaming, and a live indicator. Clicking that card opens the stream in a pop-out window they can resize and position freely on their screen. They can watch while browsing other channels, while playing their own game, or while doing anything else - the stream is in a separate moveable window.
Your own gameplay performance may be slightly affected by the encoding overhead, particularly at higher quality settings on mid-range hardware. Discord's game capture is relatively efficient, but streaming while playing adds CPU and GPU load on top of running the game itself. If you notice frame drops in your game after starting the stream, lowering the stream quality setting (not your in-game graphics) is the right adjustment.
Game audio is included in the stream by default - viewers hear your in-game sound. Your voice also comes through since you're in a voice channel. This means viewers get both the game audio and your commentary without any extra setup, which is what makes Discord game streaming feel natural compared to configuring OBS audio routing.
Advanced Tips: Better Streams Without Nitro
If your game isn't detected, add it manually through Activity Status instead of defaulting to screen share. Go to User Settings -> Activity Status -> Add it and browse to the game's executable file (.exe on Windows). Once added, Discord uses proper game capture for that application, which produces better quality than the generic window capture used by screen share mode. This is worth the extra minute for any game you stream regularly.
Lower in-game graphics settings before streaming rather than lowering stream quality. Your system is doing two demanding things simultaneously when you stream: running the game and encoding the stream. If you're experiencing lag or dropped frames, reducing in-game graphics (shadow quality, draw distance, anti-aliasing) frees up GPU headroom for encoding without affecting what viewers see - they see the stream quality setting, not your in-game graphical detail level. Start with the GPU-intensive settings like shadows and reflections, not resolution.
Use push-to-talk in the voice channel while streaming to reduce audio bleed. With open mic, everything you say goes to viewers - which is usually fine for casual streaming. But if you're at a desk and there's background noise, keyboard noise, or you want occasional private moments while the game continues, push-to-talk lets you control when your voice is heard without muting yourself permanently or pausing the stream. Set a push-to-talk key in User Settings -> Voice & Video -> Input Mode.
Test your stream quality from a second device before a planned session. On your phone or a second computer, join the same voice channel and open your stream. This lets you see exactly what your viewers see - actual image quality, frame smoothness, and audio levels - before anyone else is watching. Viewing your own stream from another device is the only accurate way to evaluate it, because the local display of your game and the outgoing stream quality are independent.
What Discord Game Streaming Can't Do
The absence of VOD recording is the most significant practical limitation. When your stream ends, it's gone - there's no replay, no archive, and no way for someone who missed it to catch up. If you want a recording of the session, you need to use OBS or your GPU's built-in recording software (GeForce Experience, AMD ReLive) running simultaneously. Discord streaming is live-only by design.
The quality ceiling for free accounts - 720p at 30fps - is visible in fast-paced content. Competitive games, first-person shooters, and anything with fast camera movement can look choppy or compressed at 30fps compared to how it looks locally. For casual gaming and slower-paced content, 720p/30fps is perfectly adequate. For showcasing gameplay where visual fidelity genuinely matters, Nitro's higher quality tiers make a real difference.
There's also a practical audience size consideration. Discord game streaming is optimized for small audiences - a handful of people in a voice channel. It works well in this context. For anything resembling a public broadcast, or for audiences beyond roughly 25-50 simultaneous viewers, the reliability and feature set of a dedicated streaming platform is more appropriate. Discord streaming isn't designed to compete with Twitch for large-audience live content.
Stream latency is real. Viewers see your gameplay with a 1-5 second delay depending on their connection and location. For passive watching this is irrelevant. For any kind of synchronized gameplay - "watch what I do, then you do it" - the delay requires both people to account for it.
Frequently Asked Questions
Discord is detecting my game but the Go Live button still isn't appearing in the voice channel - what's wrong? The most common cause is that the Activity Status feature is disabled in your Discord settings. Go to User Settings -> Activity Status and make sure "Display current activity as a status message" is toggled on - this is also what enables Go Live. If that's already on, check whether the voice channel has streaming disabled at the server level (server admins can restrict who can stream in specific channels). If you're not an admin, you'd need someone with that permission to check the channel's settings.
My viewers say the stream looks fine but they can't hear any game audio - what's the issue? Game audio in Discord streams uses the system's default audio output. If your game is routing audio through a different output device than Discord expects - for example, to a headset while Discord is monitoring a different audio device - the capture may miss it. Check that your game's audio output matches your system's default playback device in Windows Sound settings. Also verify in your game's audio settings that it's set to output through the same device Discord is monitoring.
Can I stream two games simultaneously in the same voice channel? No - each Discord stream is one source at a time per user. You can switch what you're streaming mid-session (pause your stream, change the source, resume), but only one stream per user is active at a time. Multiple different users in the same voice channel can each have their own active stream simultaneously, however - viewers can click between different streamers' cards in the channel.
Why does my stream look fine on my end but viewers say it's choppy or lagging? This is an upload bandwidth issue rather than a local performance issue. Your local view of the game is unaffected by your upload speed - you're playing locally. What your viewers receive is dependent on your internet connection's upload capacity and stability. Check your upload speed (speedtest.net) and compare it to your stream quality's bandwidth requirement. For 720p/30fps, you need roughly 3-5 Mbps stable upload. If your upload fluctuates or drops, viewers see it as choppiness while you see nothing wrong. Lowering stream quality or switching from Wi-Fi to a wired connection usually resolves it.
Will streaming affect my in-game performance, and is there a way to minimize the impact? Yes, streaming adds encoding load on top of your game's existing load. The impact varies by hardware and game - a high-end system streaming a light game may see no impact, while an average system streaming a demanding game can see noticeable frame drops. To minimize the impact: use hardware encoding if your GPU supports it (NVIDIA NVENC, AMD VCE) which offloads encoding from your CPU - this option appears in Discord's voice and video settings under "Video Codec." Hardware encoding dramatically reduces CPU overhead compared to software encoding and is the single most effective way to stream without affecting game performance.
What To Verify Before You Finish
A good finish looks like this: participants can hear, see, join, and leave as expected, and everyone knows what is being shared or recorded. Before moving on, do a small real-world test: start a short private test session, switch windows, mute and unmute, and check audio from another account or device.
If audio cuts out, the wrong screen is shared, the stream is laggy, or a recording is incomplete, the most likely explanation is that device permissions, hardware acceleration, network speed, server region, or the selected audio and video source is misconfigured. In that case, use the troubleshooting or limitation section above first, because repeating the same taps usually hides the real cause.
Related Guides
Read next: Use Discord voice channels | Screen share on Discord | Use Discord on mobile
Final Thoughts
Discord game streaming is genuinely useful for exactly the use case it's designed for: sharing gameplay with people you're already talking to, without friction, without setup, in real time. The Go Live button is there, the voice channel handles the audio automatically, and viewers get a clean experience in thirty seconds of effort. For anything larger or more produced, you'd look elsewhere - but for the "hey come watch this" moment, nothing is faster.